
|
|
|||
|
Incredible Ladies
Articles Columns/Blogs
Word of Mouth |
|
|||||||||||||||||||||||
| These are the best coconut macaroons ever. The recipe is from my grandma, and I guess it runs in our family since there is desiccated coconut available, probably around 1900.
They are fantastic beginners biscuits, a perfect present to bring when invited to a Christmas party and a quickfix for receiving guests short notice. As a quickfix I only do half a recipe (about 30 macaroons, 2 trays), but in an airtight container they keep well - they should not be mixed with other biscuits, though. The macaroons would go stale and the biscuits would go soggy. I didn't want to talk about calories, it's biscuits after all. But... well, for those who want to keep track: one of those has about 50 cals. |
calorie bomb |
![]()
Kitchen tips
Since this is the perfect recipe for beginners I feel compelled to give a few kitchen tips first.

My old an shabby list which I never lost in 25 years - all the nicely written ones are gone, good thing that I never destroyed this one after writing the others. |
See, a kitchen is like an instrument and the recipe is like the piece of music you intend to play on your instrument.
Like with any instrument there is a likelihood of messing up your performance if the instrument is not kept in good working order. So if your piano has a broken key you should make damn sure that for the particular piece you don't need that key. The few rules I brought together are sort of common sense but amazingly often they are not obeyed and then the chef runs into trouble. Only very experienced chefs with a talent for improvisation should allow themselves not to comply. |
I know: It all sounds horribly complicated and a lot to remember, but I am not talking about boiling an egg or heating a tin of soup; I am not talking about playing a jingle, I am talking about playing a hit record on your instrument. You would need a bit of practice there as well, wouldn't you?
So here it goes:
So: Now you are ready to go!
![]()
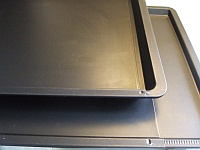
| The Tools
Baking trays (best at least 2) |
|
|
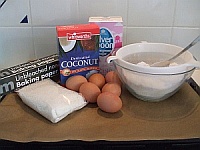
| The ingredients
6 egg white |
|
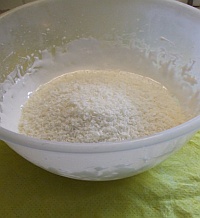
Measure the icing sugar and de-lump it. Hang the sieve over the medium bowl and measure the icing sugar into it. Then use a spoon and stir until all the icing sugar is in the bowl.
Pre-heat the oven on 170 ºC = 338 ºF for a oven with a fan otherwise go a notch higher, a max of 190 ºC = 374 ºF
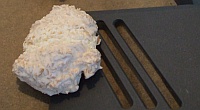
Line the tray with baking paper. Cut a sheet the size of the outer rim of the tray (doesn't have to be very precise, but in a fan oven a too big sheet will waver in the wind) and tuck it a bit into the corners of the tray. It won't sit well, but as soon as you put the macaroons on it will stay in place.
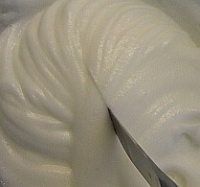
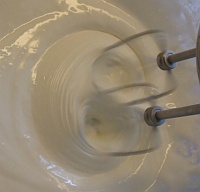
Whisked egg white
Egg white getting sticky
A cloth under the bowl The coconut can go into
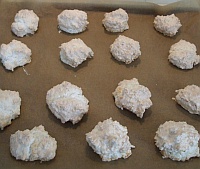
Tea spoon full of lumpy stuff
1 tray, 15 macaroons
Use a spatula to
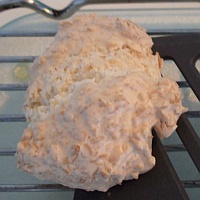
Carefully place them onto the cooling rack
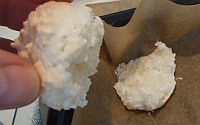
Darn, broken!
|
Separate the egg white from the yolk. Either use a device which you can buy in the kitchen department or practice the skill. If you haven't done that before you might want to do this over a big cup first, egg by egg. You can collect the yolks for scrambled eggs while the whites go into the big bowl.
Wash your hands! If the eggs look dirty or smeared wash them as well as the white will touch the shell from the outside. Use a sharp edge of furniture and nick the egg at one point at it's waist line. Now hold the egg upright with the fingertips of one hand - if you are right handed then use your left - as if it were sitting in an egg cup. Now starting from the nicked spot use the tip/nail of your other hand's thumb to create a cut line around the waist of the egg (do as if grabbing it from the top). By the time you are about half done you should feel that you can already break the top bit of the shell away. Try to keep it in one piece. As soon as you lift it off, the white will run into the bowl. Now you carefully pour the yolk into the empty half letting as much white flow into the bowl. Do as often as you need to completely separate the white from the yolk. It doesn't matter if you lose some of the white. It is important that no yolk gets into the bowl. This will work the better the fresher the eggs are. There is a white, hard-ish bit which can go either side. Should yolk have gone into the bowl get it out with a spoon. Use the mixer to whisk the egg whites until a knife cut stays clearly visible in the froth. You may want to start on a medium setting and when the colour changes from clear to white then crank it up. And mix right to the margins, the mixer may touch the bowl. If it is starting to show nice whisking patterns then do the knife test. Spoon the icing sugar into the whisked egg white. Now you will need two hands, one for the mixer which should go continuously and one for the spoon that adds another little heap of sugar once the previous one is mixed in. So no hand to hold the bowl which will start spinning as soon as it is touched by the mixer. A moist cloth like the ones used for washing dishes or a kitchen towel underneath the bowl will do the trick. Towards the end you can spoon a bit faster. The idea is to not destroy the air bubbles by the weight of the sugar. Towards the end they are already nicely sealed in and will make the macaroon fluffy. Add the desiccated coconut. Just measure it, pop it in, and stir well until you have a very sticky lumpy mass. Spoon macaroons onto the lined tray. Take a teaspoon, fill it generously and plonk it on the tray with the help of a finger scraping the pile off the spoon. Leave a bit of space between the macaroons and the rim of the tray as they expand a bit (trapped air getting hot). Pop the tray into the pre-heated oven for about 9 minutes. Oh well, that is the only really difficult bit - ovens are all different. So your's may need longer or shorter. Sometimes even the trays behave differently, depending on depth of rim or material it is made from. Macaroons should be slightly golden-brown. When they have the colour open the oven and slightly touch them. If they feel like collapsing around the midriff they should stay in a bit longer. They are a bit fragile while warm though. But there shouldn't be anything shiny like the raw stuff on them anymore. Prepare the next tray. While the one tray is in the oven prepare the next one. That is why you need space for at least two trays - one that is hot and one that is cold. Firstly just in case you are not fast enough to get the new one ready in time and handover is much easier when you take one out first and then calmly put the other one in. Not a good idea to handle two trays at the same time plus the oven door. Don't keep the oven door open for too long, though. You will want to keep the temperature as constant as possible. Cool the macaroons on a cooling rack. When ready remove the tray from the oven and put in the next one. Then wait a few moments until the hot tray stops steaming and then carefully loosen the macaroons from the baking paper using a spatula. Put them on the cooling rack and wait until they are fully cooled down before putting them into an airtight container. Since they tend to be fragile around the waist line where they usually receive a crack from the expanding air trapped in the egg white bubbles, they may break if you just would take them with your hands. Well the broken ones at least show you how the inside is supposed to look like. It still is a bit shiny/sticky, but this is the trick: Although they are cooked, they are still very moist and fluffy. Very, very yummy indeed! |
Nutrition and Recipes
General Nutrition
Shedding Fat
The Big Sugar Experiment
Let's Get Started
Ration Rule of Thumb
![]()
How2Kitchen Videos
Preface
My Basic Kitchen Setup
Hot Chocolate
![]()
Recipes
Hot Chocolate
Cosmic Coconut Macaroons
Sudorific Chicken Soup
Quirky Cough Syrup
Quark - Quickie
Rika's Raclette
Salacious Butternut Squash
Frivolous Fruit
Weird Cheesecake - II
Prawn Indulgence
Voluptuous Lettuce
Flavoured Olive Oil
Weird Cheesecake
Wicked Chicken Bun
![]()
Supplements
Iron
Vit C
Omega 3
![]()
Events
MySecretKitchen Dinner Party
![]()
| Feedback |
Copyright 2007 incredible-ladies.com
|
Author: Rika
|